Creating a burnt wood effect can be quite fun, but also a little tricky. It’s also sometimes difficult to know how to use it. I will be taking you through everything step by step on how to get the perfect effect!
Burnt Wood finishes have quite an interesting history, and it comes from an ancient Japanese technique. In Japanese, the term is shou sugi ban and has been used for many years and dates back to the 1700s. From a practical point of view, the technique allows you to make the wood waterproof and hardier. But burnt wood is also beautiful to look at. You can also make patterns on the wood, so no burnt effect looks the same!
How can I make A Burnt Wood Effect?
Well, the main part of the process is in the word- burnt. You will need, a torch, preferably propane, and a wood coat (with colors if you wish). You should consider the type of torch you use as you could find a larger one easier to maneuver, additionally, the wood will burn quicker which will make the finish smoother to look at.
Never do the burning or even the coating indoors as the odors can be harmful depending on the type of coat you use, and using a torch indoors isn’t advisable as it will create a lot of smoke. You should also think about what type of wood you are using as some types will respond better to the treatment than others.
Cedar is the best wood to use as it is more porous. But other woods are still good, such as oak. Also, remember to do a few practice goes before going in on your actual piece of wood. You can’t undo the burns, so you’ve got to get it right!

Broken down into steps
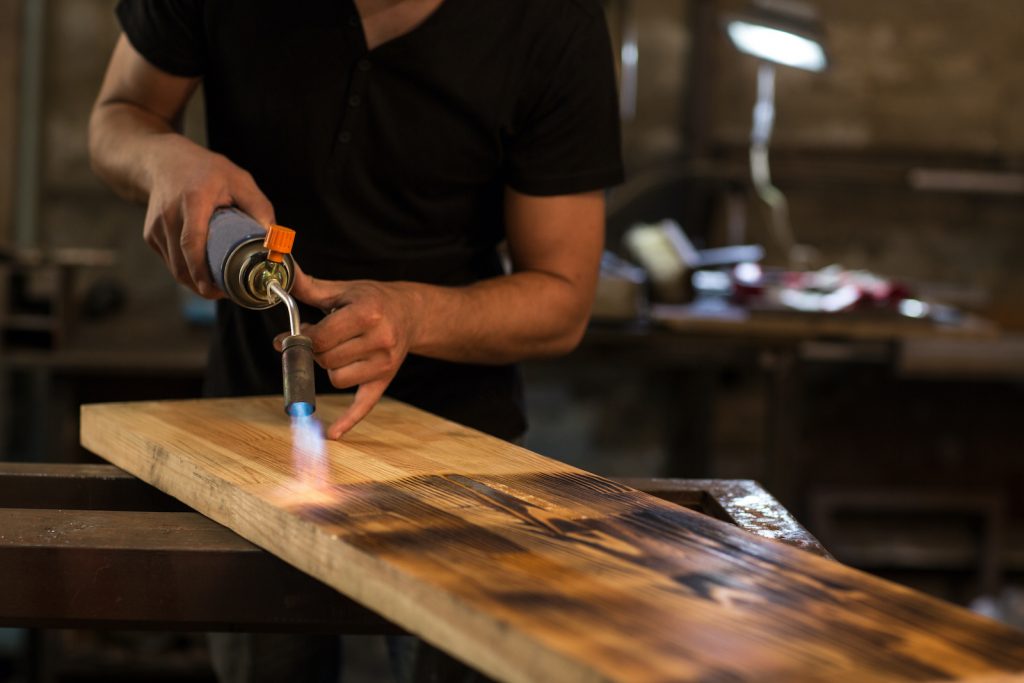
- The most fun step and the one where you get to be the most creative is burning the wood. Set your material on a flame-proof surface. Get your blowtorch (making sure you take the right safety procedures like wearing goggles and tying long hair back) and begin to char the wood.
- Using the torch lightly burn the surface (nothing too harsh). Make sure to move your torch as to not overburn one particular spot. Once you have paid attention to the piece of wood as a whole you can make more burns on parts of the wood to create a darker effect. Make sure to listen to the wood as it burns. When it begins to crack in an extreme manner don’t apply any more heat.
- After the wood has cooled scrape off the soot gently, do not apply too much pressure. You can sand here, but only lightly. Don’t panic if you can’t remove all the soot, having a small amount will add to the finished product.
- Now comes the time to stain the wood. You can get a variety of stains that all come in various colors, or you can mix in colors to clear stains.
- Take it an area at a time when applying the coat. There are several options for coating, you can use polyacrylic which is slightly less durable but smells less. Or you could use oils such as linseed which will get deeper into the wood but can be more difficult to tidy up. Polyurethane is also an option that is more durable and long-lasting than the other two. Your burnt wood should now be secured by the coat and ready for use wherever you see fit.
When should I use A Burnt Wood effect?
There are loads of things this effect can be used on. For example, furniture. As this effect can make your furniture hardier. I would say you can use it on outdoor chairs and tables to make them look that little bit nicer, whilst also making them weatherproof. You can also use the effect on flooring boards. This creates beautiful surfaces that aren’t easily worn down by feet going over them. Pretty much any wood furniture lends itself well to shou sugi ban.
To conclude this technique can be used on such a wide variety of wooden surfaces. It can help you create hard-wearing furniture items and other wooden items that also look pleasing to the eye. Though the technique is over 200 years old it’s still widely used to this day- simple and achievable for all. You only need a few items to do it and yet every item you create can be so different.


