During a recent bathroom remodel, I personally took on a clawfoot bathtub restoration project. I found out that it’s surprisingly easy. Let me walk you through step-by-step on how it’s done, and you will see for yourself!
What is a clawfoot tub?
Clawfoot tubs, also called roll-top tubs, are defined by their iconic claw “feet” at the bottom of the tub that holds the tub off of the ground. They are made of cast iron with a porcelain enamel interior. A staple of bathing in the past, they have now been sought-after for their cool, vintage look.
Some things to remember During a Clawfoot Bathtub Restoration
You are not Arnold Schwarzenegger
These cast iron tubs are beasts, weighing at least 200 pounds, maybe more. One man or woman will not be able to move the tub around themselves. Enlist help whenever moving the tub, and watch your feet!
Check for size and restorability
The ideal tub model would be a bathtub with a lackluster outside and a near-perfect interior. Anything on the outside of the tub can be blasted off easily. Try to find a bathtub with decent enamel inside, as the inside of the tub is much more intensive to repair. It may not be worth it to try to restore the inside of a tub. You can read through this guide and decide for yourself.
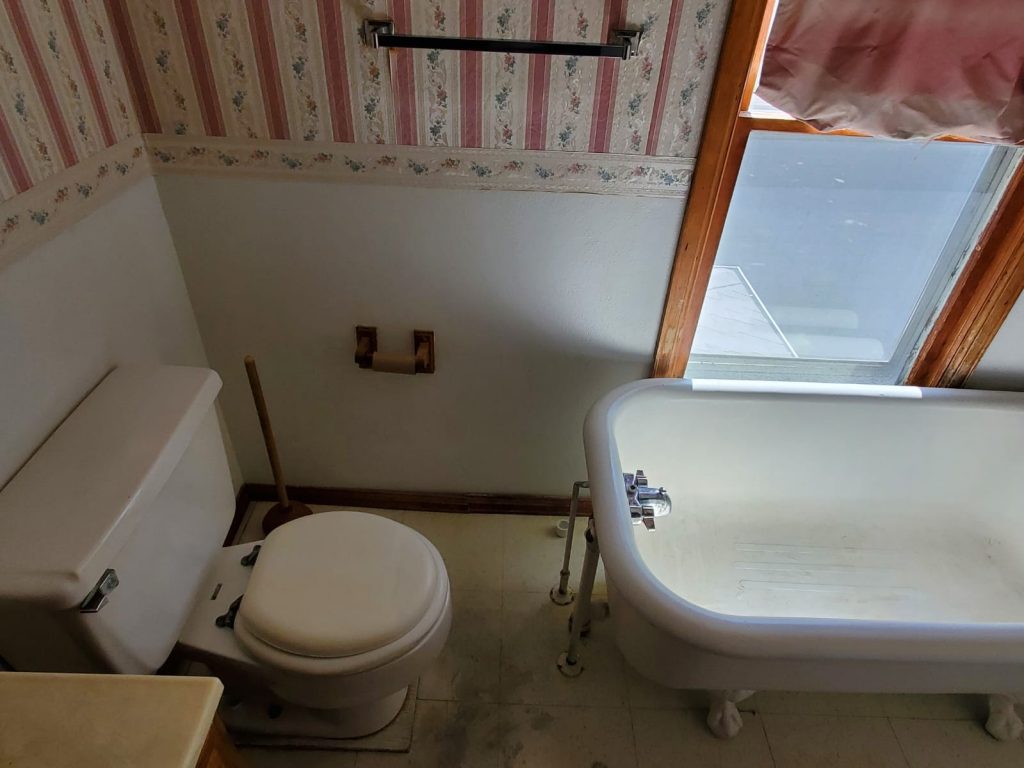
Clawfoot bathtubs vary in size, too. I decided the original tub in our house was too long (your knees could hit it as you were sitting on the toilet, with no other place for a tub to go). We definitely wanted to keep the style of the clawfoot tub, so we found a smaller tub, 4 ½ feet long, on Facebook marketplace. So we took the original bathtub to a metal recycling center, as no one was willing to pick it up (not even for free!).
Remove hardware
Before you start the clawfoot bathtub restoration process, you need to be able to take off the hardware. This includes the faucet, pipes connecting to the faucet, the feet, and the drain. Be prepared to put the feet back on in the middle of the process, as you will find out later in our guide.
Our bathtub had a pipe sticking out of the bottom of the drain that we were unable to remove, as you can see in the photos. It did not hinder the restoration process. When it came time to paint the tub, I just taped around it.
How To Restore The Outside of a Clawfoot Tub
You will want to work on the outside of the tub before starting the inside, should you choose to do decide to work on the interior.
Tools you will need
Before you get started, you will need to move the tub to a well-ventilated area, or make the space you are working in well ventilated.
You will also want these things on hand:
- Paint remover, but that likely won’t be enough, so…
- Angle grinder
- Brush attachment for the grinder
- Extension cord
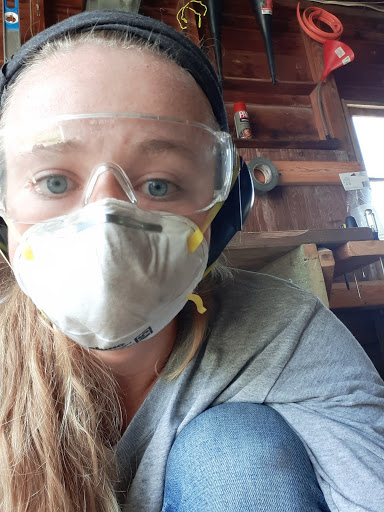
- Respirator
- Safety glasses
- Earmuffs (hearing protection)
- Gloves
- Long sleeve shirt, pants and closed toe shoes
- Shop Vac to clean up the mess
Flip the tub over, remove feet and grind away
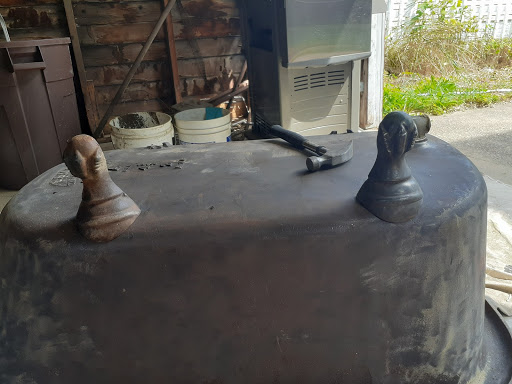
First, remove the feet in order to get paint off the entire tub. Our feet slid in and out of slots on the bottom of the tub and had a screw to secure them. You may find you need the help of a hammer to (as gently as possible) get the feet to come on and off.
I found that paint remover was not enough for my tub. After smothering the tub with a thick, goopy layer, all that came off was barely one layer of paint.
So I continued to remove paint by using an angle grinder with a brush attachment to grind away all the layers of paint (there were at least 3, no previous owner bothered to remove paint before repainting). Wear proper gear like a respirator, protective glasses, and earmuffs.

I chose to grind down the paint until I could see the bare cast-iron layer, in order to get the smoothest paint job possible later when I repainted it.
Reattach feet to grind paint off the feet
Once the whole outside of the tub is bare, it’s time to remove paint from the claw feet. The tub itself makes a great “clamp” for the feet, especially if you don’t already have one on hand. Fasten the claw feet back on the tub and take the angle grinder to the feet.
Make sure to get the grinder in all the creases of the feet. After you are done, take the feet back off. These will be painted separately from the tub.
At this point, you are done grinding paint away. Go ahead and vacuum up all the debris from grinding.
Scrub with soap and water and rinse
Time to give the bathtub and feet a bath! Do this to remove any debris from the surface of the tub and feet. Remember that we are dealing with cast iron here, so dry off the surfaces immediately after rinsing in order to prevent rust from forming. It’s very quick, watch out!
Let the tub and feet dry completely. It might be a good idea to run a tack cloth over the surface before applying paint.
At this point, the tub was moved to the grass in our yard (still upside-down). I used a rag and soapy water to wash off the tub and the hose to wash it down. After it was dried, we slid a big piece of cardboard under the tub to get ready for the paint.
The feet can be set aside and painted later.
Tape off enamel “lip,” holes, and hardware
This step is taken in order to protect the porcelain enamel on the inside. Make sure the enamel on the inside does not get paint on it by taping off any hardware, holes where hardware used to be, and even the rolltop part of the tub.
Paint the tub
If you are working in an enclosed space, prepare your workspace to create the proper ventilation. To paint our tub, I used a Graco brand airless paint sprayer that we had purchased, as we had many other paint projects to do throughout the home. Any paint sprayer will be ideal for a project like this, as it will give you a near-perfect paint finish.
I used 2 coats of semigloss Behr paint + primer named Shadow Mountain. You may choose to add additional primers before painting, primers specific for metals and ones that have anti-rust properties. This is up to you. For our tub project and budget, we thought two coats of paint + primer combination paint was enough for the job, since water was unlikely to be on the outside very often.
Remember to follow these general paint spraying guidelines: practice on a piece of cardboard first, use medium-paced strokes, and stay even with the surface the whole time while spraying. If you notice a missed spot, do not go over it right away. Wait until the first layer dries, then go back over missed spots during your second layer.

Paint the feet
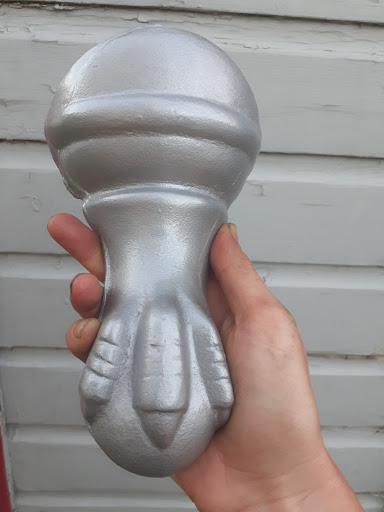
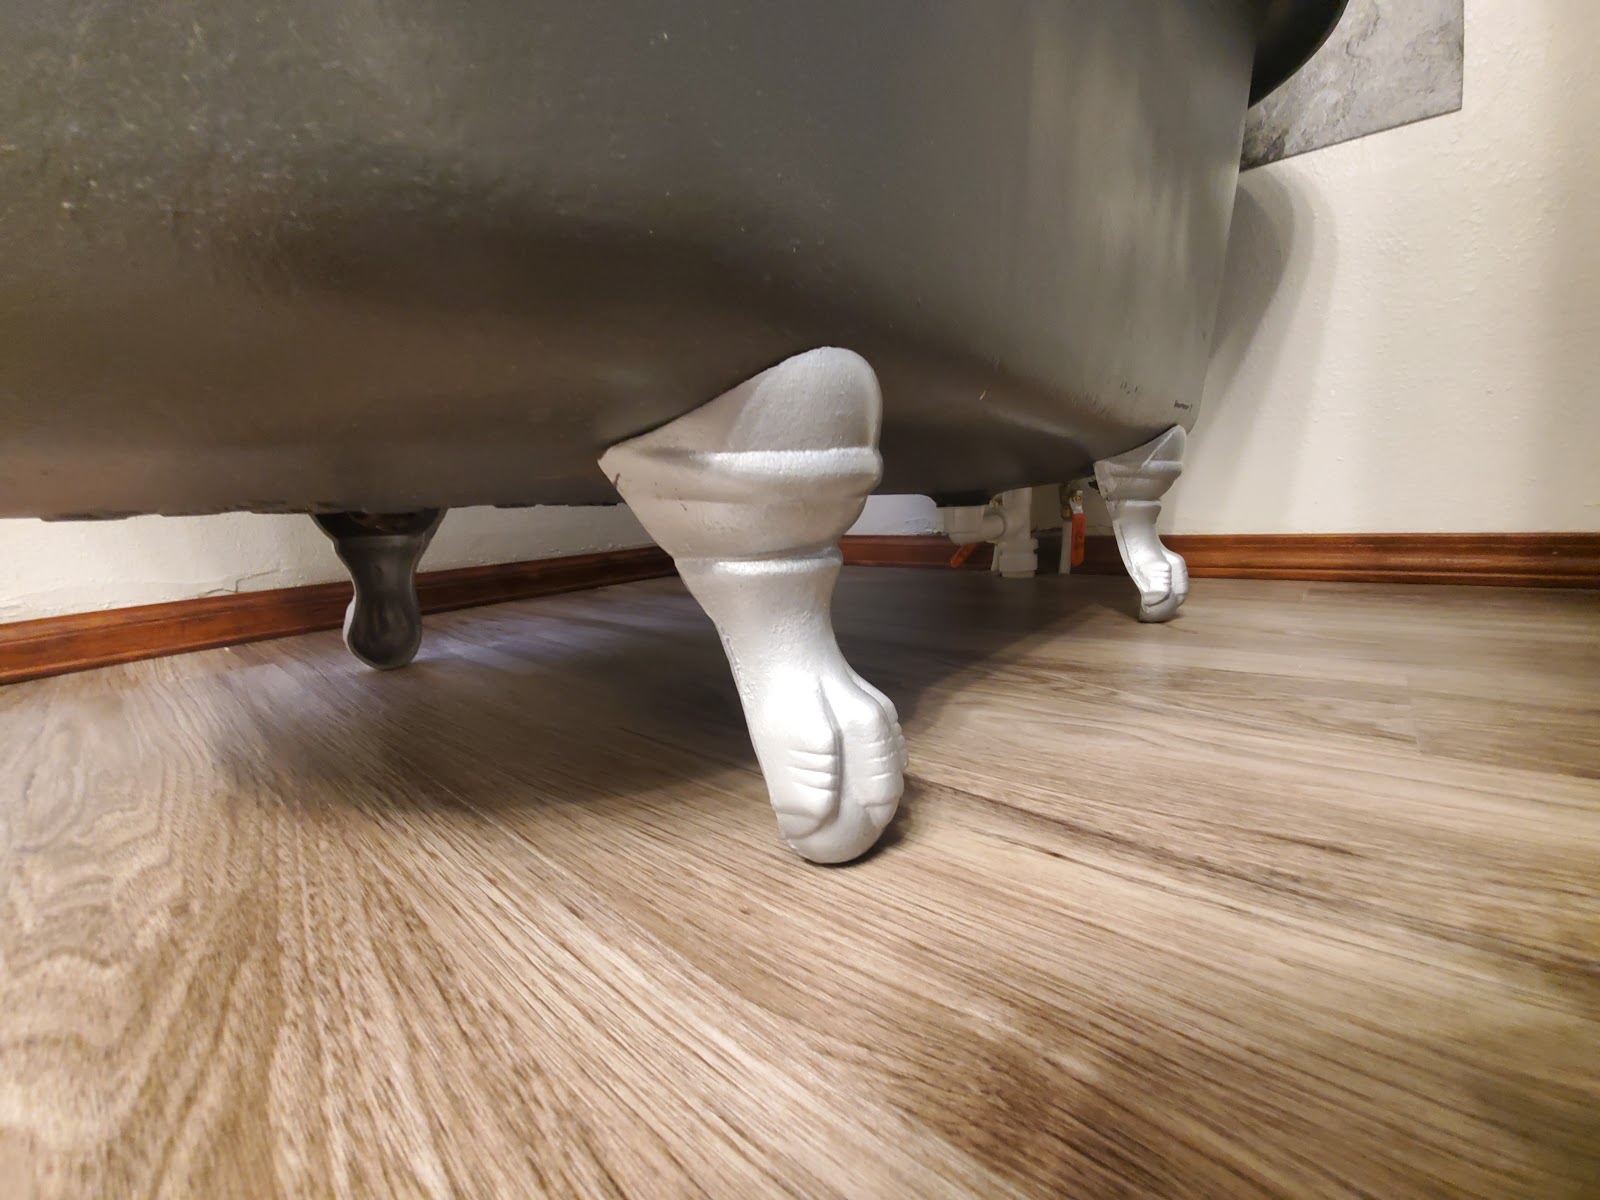
While waiting for the tub paint to dry, you can start painting the feet. We decided we wanted the feet to look like they were a silver metal material, but you could paint them any color you think would look good. Sometimes clawfoot tubs, tub and feet, are all painted white.
I used a can of “galvanized steel” RustOLeum spray paint to refinish the claw feet. I laid the feet one-by-one on a smaller piece of cardboard and worked all the way around the feet to spray them down. One or two coats are good. Don’t forget to let the first coat dry completely before adding a coat.
Move the tub to desired location
Once the paint is completely dry (give it at least several hours, a few days to be safe), get your tub-moving buddy and haul the tub to where it needs to be. Consider leaving the claw feet off the tub until it is moved to where you want it to be. This way, you have less tub to worry about dinging up against walls, door trim, or handrails.
Attach hardware
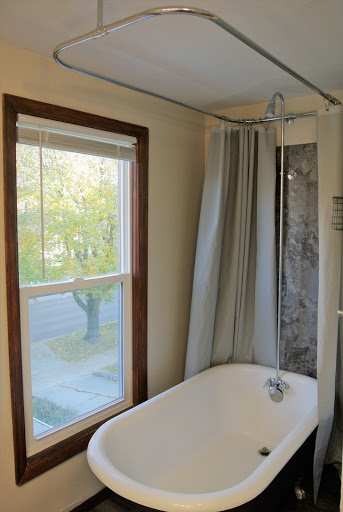
Install the feet and previous or new hardware back on to the tub and get it ready for your first soak. Since we only had one bathroom in our property, we decided to install a shower attachment with a shower curtain rod made especially for clawfoot tubs. The shower attachment was installed into the spigot of the bath, one point on the nearest wall, and at two points in the ceiling.
At this point, since the inside was in good condition, our tub was all ready for use. We loved the way it looked in our newly remodeled bathroom!
If you’re choosing to refinish the inside of the tub, you are not quite done yet. Read on to find out what to do next!
How to Restore the Inside of a Clawfoot Tub
DIYer’s, proceed with caution
For the outside of your clawfoot tub, pretty much all you need to do is to remove paint and repaint. The inside refinish requires many different chemicals and agents. There are DIY bath refinishing kits out there, but they are hit or miss when it comes to a good surface quality that lasts. You may choose to hire a professional service to refinish the inside of your tub for you.
Clawfoot tubs, depending on the area you live in, are fairly easy to find secondhand. We found a great option on our local Facebook Marketplace, but you could also look on Craigslist. If you can find a tub with a good enamel coating on the inside, go for it, as it is not as simple to restore the inside of an enamel tub.
If you happen to be stuck with a tub with damaged enamel, and you absolutely have to DIY, you can work with it and have a perfect-looking one in no time. Here’s how you do it properly.
Note: during this whole clawfoot bathtub restoration, make sure you have proper ventilation by being outside, opening windows, using fans, and wearing a proper respirator.
Clean the surface
You need a clean, even surface to work with. Remove any debris, soap scum, caulk, or previous “repairs”. This may require special cleaners, or just a lot of elbow grease.
Chemical bath
After it’s scraped clean, you need to start removing the old enamel. This requires a series of chemical layers. It’s a bit technical, so pay close attention.
First, rub down the enamel with an alkaline emulsifier. These are typically used for cleaning carpets or removing wax off floors. After that, wipe on an acid-based cleaner (like citrus) to neutralize the emulsifier, then follow all of that with some ethyl alcohol to make it very clean.
Fill scratches and divots
Sometimes, the inside of the tub has dings and scratches. Use a trowel and some fiberglass putty to fill in these holes. Follow up with sanding, glazing putty if necessary, and resanding. Run a vacuum if the debris is excessive and then wipe it all down with a tack cloth to remove all the dust from the surface of the porcelain.
Prepare tub for new enamel coating
In order for the layer of new enamel to stick to the inside, you need a quality bonding agent. This is where the DIY restoration process gets tricky. You need to find something that will adhere the new coat of enamel to the tub and not damage your pipes when you inevitably flush it down the drain.
When you look for a product for this, make sure it’s “eco friendly” and states specifically that it will not damage your plumbing. Otherwise, you could end up with much more work than you started out with.
Follow the instructions on the bottle for applying whatever bonding product you decide on.
Spray Acrylic Urethane Enamel
You will want to use a paint sprayer and spray about 3 coats of the new acrylic urethane enamel. This can be done with an airless paint sprayer or a paint sprayer attached to an air compressor.
Again, make sure your space is properly ventilated. This paint can be found easily at your local hardware or paint store. Wait at least 15 minutes before applying the next coat of paint.
Finishing up
If you notice some unevenness, you can wet sand with extremely fine sandpaper. Dry it all up and then buff it out. You can use an electric buffer (like for a car) or buff by hand. If you want, you can wax it by hand. If you choose to do this, make sure the wax is safe for your pipes.
FAQ
How do you restore and clean a rusted clawfoot Bathtub?
Unless the rust has torn a hole through the tub (which will definitely need professional help or the tub needs to be recycled), most rust will come off with some light to moderate cleaning.
If it’s on the outside of the tub, between the angle grinding and washing, it should be enough to get all the necessary rust off.
For rust on the inside of a clawfoot tub, start off with a light cleaner (like a vinegar/water solution and a magic eraser), and gradually try heavier-duty cleaners (like scouring pads, steel wool, Barkeeper’s friend, etc.). Be very gentle, as you do not want to unnecessarily damage the enamel coating. You will be surprised how much rust comes off just with a little cleaning!
How much does it cost to restore a clawfoot Bathtub?
Depending on the equipment you can lay hold of, it’s fairly inexpensive to restore the outside of a clawfoot tub. We were able to borrow an angle grinder, but we purchased the wire brush attachment for about 10 dollars. The paint was probably around 20 dollars.
We already had the protective equipment necessary for the job. The paint sprayer was purchased for around 100 dollars, but like I mentioned, we got tons of use out of it painting the whole rest of the house (inside and out)! You can cut costs here by choosing to roll on the paint and still get a great-looking tub.
Is it worth it to refinish a clawfoot tub?
Yes! We were able to find a tub with a near-perfect enamel coating on the inside and no major damage done to it otherwise. This tub was an easy and fun clawfoot bathtub restoration project.
I will add this caveat: as you might have been able to tell through the article, I do not recommend a DIY refinish to the inside of a clawfoot tub. It requires some technical knowledge and special chemicals. Trying a refinishing kit just to have it fail might be very frustrating. If you choose to go this route, do some research on what kits work and what a professional refinish might cost you.
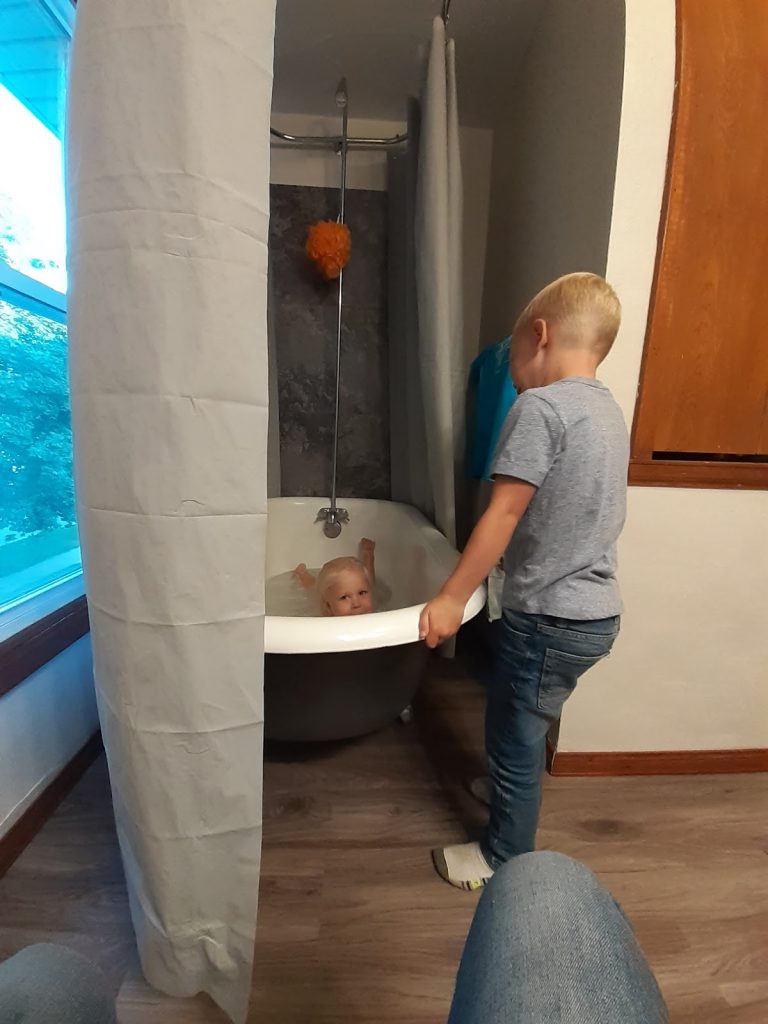
A relaxing soak awaits you!
We applaud you for wanting to bring new life to your clawfoot tub. This clawfoot bathtub restoration project is very rewarding and will last you a lifetime. Such a wonderful and classy looking antique deserves some TLC. We hope we have helped you with everything you need to complete this project from start to finish.
Feel free to add more questions or thoughts in the comments!
Enjoy your new (looking) and full restored tub!

1 comment
This was a very informative article!