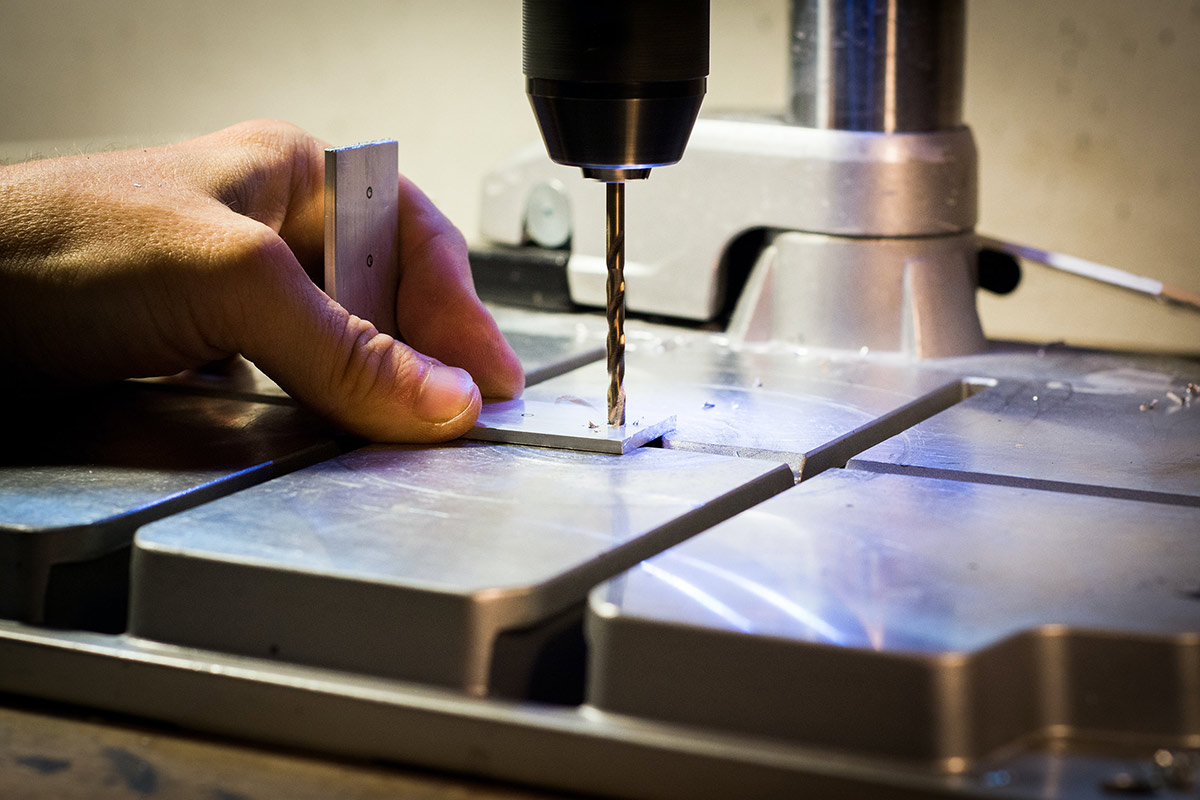
So, you’ve just invested in a beautiful new drill press for your workshop – but just how do you take care of it? In this guide we’ll go over some of the common tasks you’ll need to do in order to use your press and keep it in top condition.
How to change speed on a drill press
How you change the speed on your drill press with depend on which of the two drill press types you have. Some drill presses are able to change speed by simply twisting a knob. Most presses however run off a belt drive system, and you will need to change the belt arrangement to change the speed of the drill.
First off, make sure your drill is turned off, and it may make you feel safer if you unplug it entirely. Next, open the top of your drill press to reveal the belt system, which usually consists of two conical shaped pulleys with a belt running between them.
Next, you’ll need to look for the belt tensioner – the position of which differs from drill press to drill press. This lever will de-tension the belts, and allow you to move them around. Take a look at the speed table on the drill (normally located inside the top of the lid) and check what belt position your target speed requires.
Set the belts into the required position, and then re-apply the belt tensioner to re-tension the belts. Make sure you have left the system free and give the chuck a twist back and forth to check nothing is caught or set incorrectly. If everything looks good, close the lid and plug the drill back in – you’re good to go!
How to replace a drill press chuck
Drill press chucks often need to be changed to accommodate different sized drill bits or accessories. They are typically very easy to change, and can be swapped out in a matter of seconds.
Some drill presses have a slot in the side of the drill quill (the bit that goes up and down), into which you insert a wedge-like tool. You then tap the end of this tool with a hammer, and the chuck will drop out. For other types of presses, there is no slot, so you’ll need to set a piece of hard wood against the drill chuck, and knock it downwards from above using a gentle tap of the hammer.
Once the drill chuck is out, you’ll notice it will likely have a taper of some kind on it. This fits into the quill with a precise friction fit. When you replace the drill chuck, ensure you have the drive fitting on the top properly aligned, then give it a firm press up into the drill quill. Finally, lower the drilling platform, and give the chuck a tap upwards using a soft hammer to make sure it is firmly secured in place.
How to bolt down a drill press
Bolting down your drill press will greatly improve it’s accuracy – particularly if it is a bench top drill press. You can also bolt down larger floor standing presses in the same way for extra security.
For either type of drill press, first make sure you’re happy with the position, and drill is straight and level. If necessary you can adjust it or the bench to make it level. Now locate the holes in the base to secure it down – typically found on the four corners of the base. Find a clearance drill bit of the holes and insert it into the first hole. Now give it a light tap with a hammer from above – to leave a mark in the surface. Repeat for the all the holes.
Now move the drill press out of the way, and locate the dimples you made with the drill bit. Widen them using a punch or bradawl, and then drill each out one by one.
You can now replace the drill and line it up over the holes. Put bolts through the holes and tighten the drill press down securely.
How to center a drill press
Centering a drill press will help you ensure the drill chuck is perfectly located over the position of the hole you want to drill. This is an older process, and is now replaced by lasers on modern drill presses.
To center the drill press, you’ll first need to dimple your hole using a center punch and a hammer. Having done that, put a centerfinder drill bit into the drill chuck. A centerfinder is a special drill bit that looks like a fat drill that has been cut half way though. The lower section can move around relative to the upper part.
Lower the centerfinder into the workpiece, and locate the tip of it into the dimple. If the work piece is perfectly aligned, then you’ll see the lower section and upper section of the center finder directly on top of each other. If they aren’t aligned, you’ll feel the lower part when you move your hand up and down the centerfinder.
Reposition the workpiece until the centerfinder is aligned, and then clamp down the workpiece. You have now centered your drill, and we recommend you drill a pilot hole with a centerdrill before drilling your final hole.