A key part of any DIY project is the planning, it sets you on the right track for a great build! When thinking about building a storage unit it is essential that proper plans are made. Planning and building a piece of furniture entirely out of raw materials yourself is a great accomplishment.
With some tools, patience, and the right materials, this project is a great way to get to grips with your own DIY.
I discovered this myself during my garage renovation project, as some storage space was needed for our recycling boxes. It looks a mess to simply leave them scattered all over the floor. I began to plan out how I could build a compact, but suitable storage unit. Plus I want to build it with just the materials I had already at home.
Whatever your shelves may be for, it’s a great way to test your DIY skills and build them to your own needs! Here is my guide on how to build a simple storage unit.
What do you need to build A Storage unit?
For this storage unit project, there is no need to go to your local hardware store and buy the entire power tool section! Look around your home and find the tools you need. Even a piece of string can be used instead of a tape measure.
Also, it’s important to remember I used wood from both an old closet and spare floor panels from our house. This saved me from spending a lot of money on raw materials when building the storage unit.
To start from scratch, I would need:
- Tape measure
- Pencil/marker pen
- Flathead Philips woodscrews of suitable length, a box of 20-25 ($3-4)
- A large board of Medium density fiber wood with a thickness of at least 8mm.
- Electric drill with a hammer function.
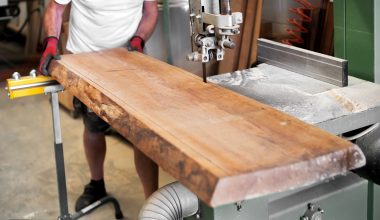
- Electric jigsaw and detail sander or a multitool with sanding and saw accessories.
- Two handheld clamps
A tape measure and pencil should be in every tool kit and can both be purchased for no more than $5. MDF is a suitable wood for DIY projects such as this, as it provides a cheap substitute to solid wood.
The size of the screws depends on how big you need your unit to be and the wood panels you are using. Make some measurements prior to construction and buy woodscrews according to the width of your material.
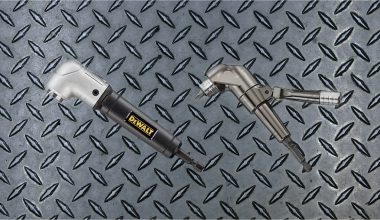
As for the electric tools, a drill, a jigsaw, and sander is great to have, or a multitool. I did this with an oscillating multitool with sawing and sanding attachments that did the job perfectly for me.
The multitool was cheaper than buying a separate sander and jigsaw, as it only cost me $40. I would recommend buying these separately for future projects when using thicker material.
Where to start
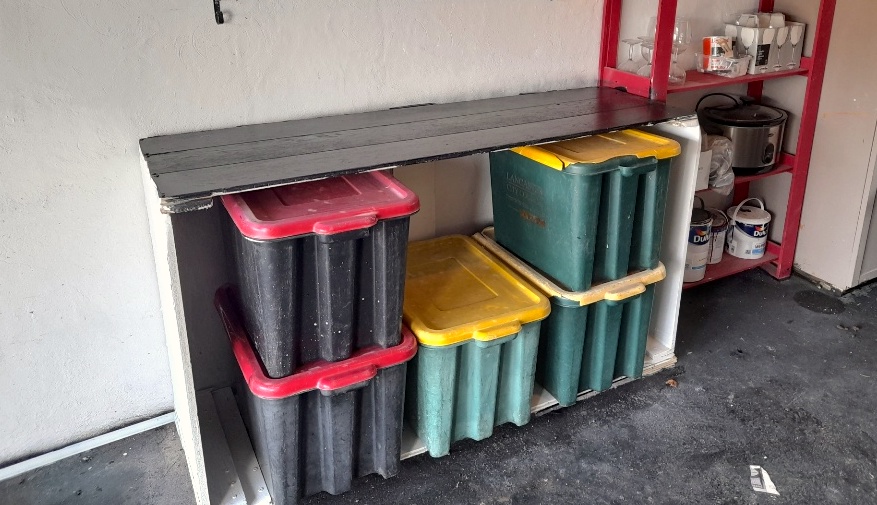
Now you have the materials and tools, you can get going with building the storage unit. The first step is to decide how big you want the unit to be and what you want to put there. In my case, I have 6 recycling boxes to store, so it must be big enough for these.
To decide this, I measured the dimensions of all the recycling boxes stacked together in two rows of three and measured the height, length, and depth of this. The dimensions I obtained meant my unit would measure at 1300mm long, 800mm high, and 650mm deep.
From this, I cut could out the following pieces from the MDF board:
| Piece/component | Size |
| 2x side panels | Length 800mm, width 650mm |
| Top panel | Length 1300mm, width 650mm |
| Bottom panel | Length 1300mm, width 650mm |
| 3x support panels | Length 800mm, width 200mm |
Assembling Your Storage Unit
After cutting the pieces above using the multitool attachments, it is ready to be pieced together.
Firstly, I attached a drill bit slightly smaller than the width of the screws to the cordless drill. This meant I could drill pilot holes into the wood. Pilot holes are small holes used to make sure the screws go in straight. Allowing secure joining of the panels and avoiding splitting wood.
With a pencil, I marked hole points in each corner on the bottom panel and clamped it tightly to a side panel piece. I then drilled through at the marked points into both pieces, making a pilot hole deep enough to penetrate both.
To permanently join the panels, the wood screws were inserted using a screwdriver drill bit and drill.
Next, repeat for the other side panel, and meant that when turned upside down, the top panel could lay on top of the unit. Drill pilot holes through the panels. Then insert the woodscrews to attach the top panel.
It was now a freestanding unit held together by tightly-secured wood screws.
To ensure the unit is stable 3 support panels were laid across the unit when flipped on its side and attached with wood screws. This added a back to the storage unit and meant that it was held together securely.
Josh’s DIY Top Tips
- Remember to add 50mm onto each measurement, as this allows for extra space inside the unit and account for any cutting errors
- Costs of building a storage unit can be expensive, such as MDF, so try to use materials you already have
- Use the same woodscrews throughout to save on cost
The finished product
Now the pieces had been put together, the unit was secure and stable, but needed some touching up. The edges were then sanded down to ensure a smooth finish. Plus slight curves were made on the sides for a rounded finish. With some spare paint, I brightened it up with some color. MDF, however, looks natural on its own and so paint is not necessary.
Building a storage unit was a great starting project to try out my joinery skills and came in useful too. I built this for my newly renovated garage but storage units can be used all around the home.