Circular saws are a great tool for any DIYer or professional to have. They are especially great for beginners wanting to start woodworking projects. You will not find a more versatile or portable saw around. Luckily, using a circular saw is straightforward and easy to figure out, any beginner can do it. With a little bit of information and a few extra safety and measuring tools, you will be on your way to making all kinds of cuts to finish your projects.
Parts of a circular saw
Take a good look at your saw. You will see two handles. The first handle (trigger handle) has a safety switch and a trigger. In order to turn on the saw, you have to simultaneously push the safety switch with your thumb and pull the trigger. Behind the trigger handle is where your battery pack or cord will be. The second handle is towards the front of the saw. You can grab this handle with your free hand and guide the cuts.
Around the saw blade, you will see blade guards. These protect you from the sharp edges and they protect the blade from getting damaged when you set it down. The bottom blade guard automatically retracts as you make a cut.
Perpendicular to the saw blade is the base plate. Its other names are base, shoe, or boot. This is what you will set on your material when you cut. The base plate has notches on it to show you where your saw blade will be while making a cut.
Safely using a circular saw
Using a circular saw can be dangerous, but it doesn’t have to be. Before making any cuts, follow these safety guidelines:
- Clamp down the material to be cut on a stable surface. Do not use your hands to hold the material down.
- Only clamp one side of the material.
- Make sure the saw blade is no more than ¼ inch below the material to be cut. Too much exposed blade under the material can possibly catch something hanging under the material. It’s also less efficient.
- Wear protective and tighter-fitting clothing, eyewear, earmuffs, and a dusk mask.
- Try not to force the saw to move. Let the blade move the saw as much as possible.
- Always use sharp blades.
- Wait for the blade to stop completely before lifting the saw from the material.
- Remove the battery or unplug the saw before taking out the saw blade.
What is kickback and what causes it?
Many people who have never used a saw before wonder what kickback is and how dangerous it is. Kickback is an unexpected recoil while a powerful machine is in use. Kickback happens on a circular saw when any of these things happen:
- Clamping both sides of material
- Making cuts with dull blades
- Forcing the saw
On a circular saw, these actions can bind up the saw blade. This causes kickback, which is sending the power backward, towards the user, instead of forward. Follow our safety guidelines listed above to prevent kickback on a circular saw from happening.
How to use a Circular Saw for Different cuts
Circular saws can make a variety of cuts, including:
- Crosscuts
- Rip cuts
- Mitre cuts
- Bevel cuts
- Plunge cuts
- Notch cuts
Crosscuts are the most simple cuts that go down the short side of a piece of material, against the woodgrain. Rip cuts go down the long side of the material, with the woodgrain. Mitre cuts go through material diagonally on the width, while bevel cuts are a diagonal cut in depth.
A plunge cut is performed by stopping the cut of the saw before it goes all the way through the material. After making several plunge cuts in a marked-off area of thick wood, you can use a chisel to easily remove the cut-up wood inside for a notch cut.
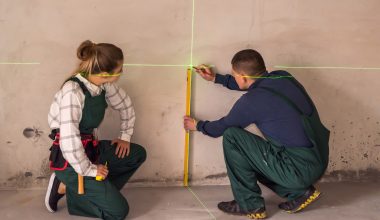
Making straight cuts
If you’re serious about extremely precise cuts from your circular saw, invest in some cut guides and clamps. A straight piece of scrap wood will work as a cut guide as well.
For shorter cross cuts, keep a combination square (also known as “speed square”) and a clamp nearby. Align your saw with the guideline for the cut, put your combination square next to the circular saw’s base and clamp it down.
For rip cuts, use a long beam level or metal straightedge. Just like the combination square, clamp this to your material while aligning your saw with the guideline. Now, when you make your cuts, these measuring tools will keep your saw and cuts straight.
Freehanding cuts
It is possible to freehand cuts with a circular saw, especially with a worm drive circular saw. Worm drive saws are best for the freehanding circular saw professional. They are more powerful and tend to do what you want them to do more than sidewinders (the more common circular saw). You won’t want to try this until you have lots of experience cutting with circular saws.
If you plan to do a lot of freehanded cuts with your circular saw, consider buying a saw that suits your dominant hand. This is important so you can easily and clearly see your guideline and the saw blade position without having to crane over the saw to see. A right-handed person would favor a saw with the blade positioned on the left of the saw, and vice-versa for a left-handed person.
Also consider the saw’s weight, as a lighter saw will allow freehanded cuts to glide more easily.
Pro Tip – To get very clean cuts, place the material good-side down, and place a piece of masking tape next to the cut line. This prevents splintering of the wood.