A laser level is a super convenient tool to have around. Especially if you are doing things like hanging a lot of pictures, laying tile, hanging up cabinets, or framing walls. Its job is to shine a straight level line against a wall, so you know that what you are hanging is not crooked. Therefore it is essential to calibrate your laser level to be perfectly level.
Even though your laser level might be labeled as “self-leveling,” you still need to check for accuracy every once in a while and adjust. If you find your level is inaccurate, you can calibrate the level yourself to keep it working correctly.
We’ve searched for the best and easiest methods to help you calibrate your own laser level. Read on to find out why you need to, how to do it, and how often you should do it.
What does it mean to calibrate a laser level?
Calibrating a laser level means adjusting the device to make sure its accurate and outputs a completely level line. This can be done by opening up the device and adjusting the pendulum inside, where the laser line shines from. Some laser levels have self-calibration buttons, with which you adjust the laser line by pushing up and down buttons.
Every laser level will give you an accuracy rating, which is somewhere around 1/16th of an inch for most models. We will go over how to test this accuracy in the steps below.
Why you need to calibrate
The reason to calibrate your laser every so often is so you know your laser is giving you a perfectly level line, every time.
All laser levels come with a locking mechanism for when the tool is not in use. This keeps the interior pendulum in place. If you do not lock up the pendulum, and you are not careful with the laser level (for example, it bounces around in the back of your truck while driving around), the pendulum will bounce around inside the device and get thrown off. So, be sure to always lock your laser level before moving it at all.
Keep in mind, too, that a cheaper laser level will probably need more repeated calibration than a more expensive one. So, if you choose to purchase a less expensive one, you may end up spending some time calibrating the level on more occasions.
Can you calibrate a laser level by yourself?
Though slightly technical, yes, calibrating the laser level is plenty possible to do on your own. If your level is self-calibrating, you will only need tape, possibly with a pen and paper (depending on your preference). If it is not self-calibrating, you will need a screwdriver small enough to unscrew tiny screws inside the laser level.
How to Calibrate a Laser Level
1. Check for accuracy first
First you need to see if your laser is indeed inaccurate.There are three different ways you can do this. Choose one that is most convenient and suits your accuracy needs.
First Method
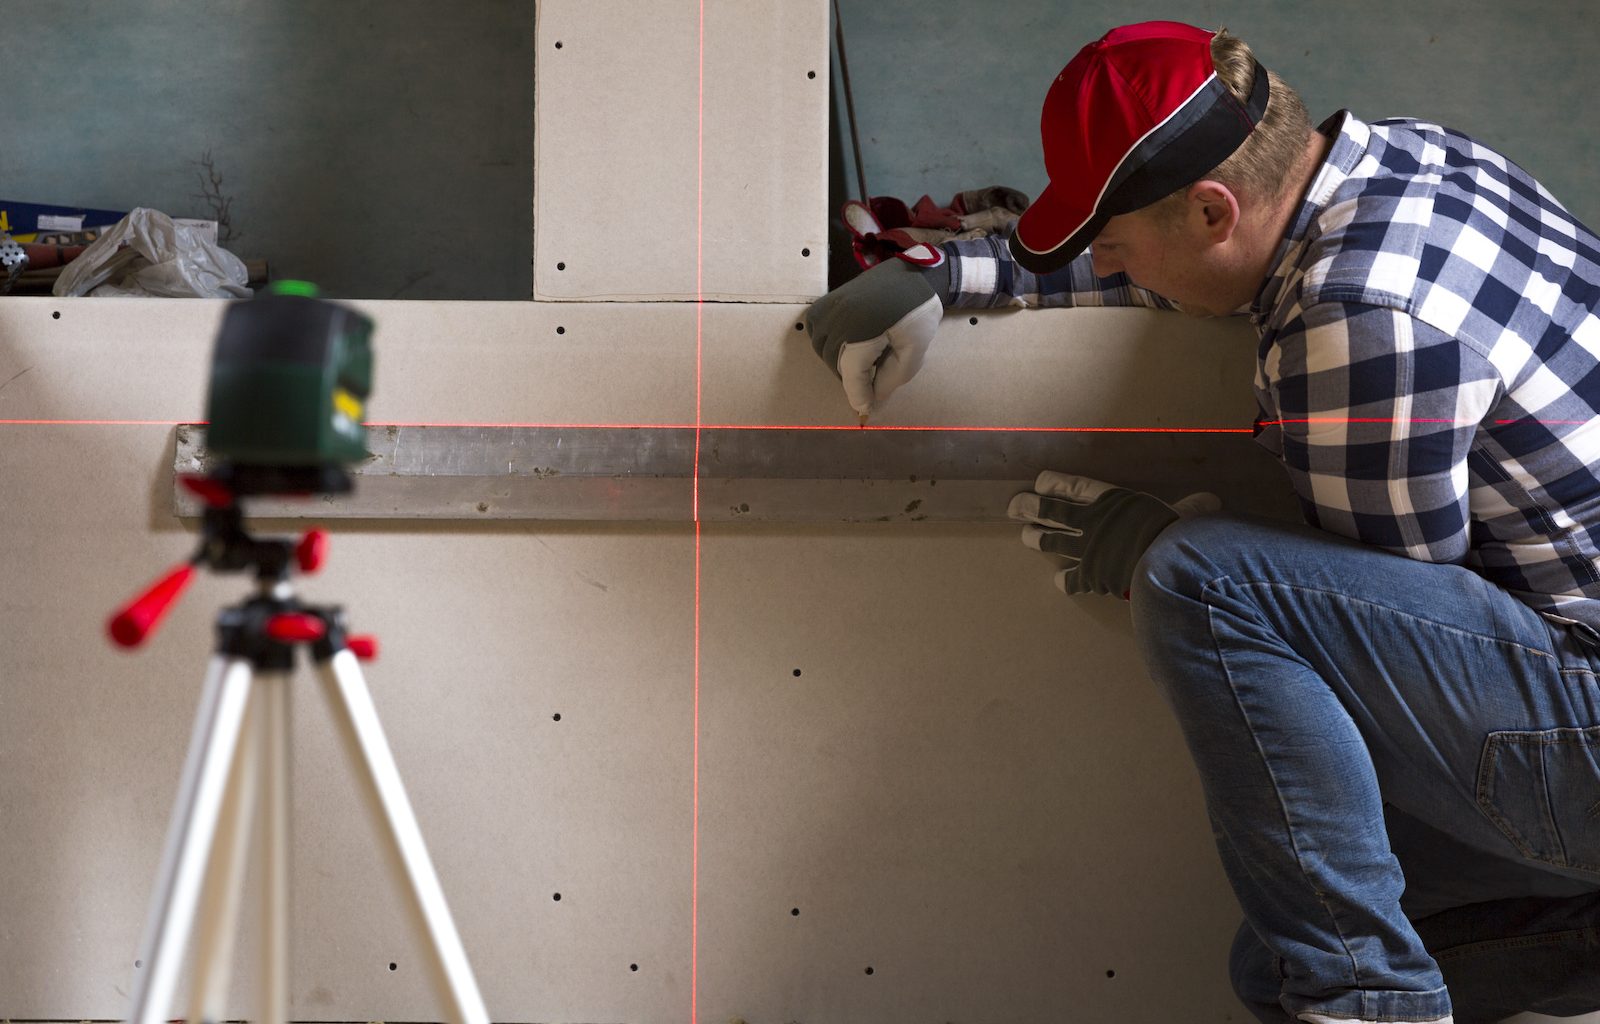
Start by placing the laser level on a tripod. The first method is shining the laser lines onto some wall tile if you trust that the tile has been laid evenly in the first place. This is probably the fastest way to check, as you can check both the Y and X-axis, but also has extra variables that could make your findings inaccurate.
Second Method
Another method is to shine the laser line onto a wall and mark two separate spots with tape. Be sure to place the tape directly under the line and make sure the laser line is touching the tape line. Now, move the laser level to another part of the room, raise it up on the tripod, and line the laser line back on to the second piece of tape as perfectly as you can. Finally, check the first marking, and see if the line is off at all.
Third Method
This might be a good way to check for accuracy if you are doing so in a tight space and do not have room to move the laser level around. Start as before with the laser level facing a wall at least 20 feet away. Tape a piece of paper to the wall and mark where the line is shining. A straightedge or ruler might be useful to make it totally straight.
Next, rotate the laser level 180 degrees and shine the light on the same spot. If your laser has a Y axis, you can mark an additional line at 90 degrees rotation. Note the differences between the lines.
If the line is off of the mark more than the accuracy range stated in the manual, it’s time to calibrate the level. For example, if your laser level says it is 1/16th inch accurate, that means the lines need to be more than 1/16th of an inch apart in order to necessitate calibrating the laser level.
For self-calibrating models, simply push the up and down buttons per your laser level’s manual instructions and calibrate the laser level.
2. If manually calibrating, open up the level and check wires
Remove the batteries and open up the body of the level by removing all the screws. Gently tug at the wires with your screwdriver to make sure they are not hindering the pendulum in any way. Otherewise this will definitely throw off your level line.
3. Adjust screws inside the body for calibration
For this step, you will need a very small screwdriver. If your laser level has an X and Y axis, there will be two screws responsible for the position of the pendulum.
Put the laser level back on the tripod and the batteries back in, as you will want the laser to turn on now. Make sure the pendulum is locked and unscrew one of the screws holding the pendulum in place. Unlock and move the pendulum back and forth a few times, then let it be. Watching for the line to be completely straight with your level measurements on the wall. Lock it back in, put the screw back in, and unlock to check and see if it is level now.
Follow these steps for the other axis as well.
4. Check and recheck
You will want to check for levelness several times during this process, while the body of the level is open and after you put it all back together. Use the lines you previously made while checking for accuracy. For added accuracy checks, restart this process from step 1, making new lines marking where your laser level line is shining.
5. Success! Or, leave it to professionals
Hopefully, you have calibrated your level correctly at this point, and it is back in prime condition. If not, though, don’t lose hope. There are skilled professionals that can calibrate your level for you with more precise measures. These professionals are easily found online.
How often should I calibrate my laser level?
It depends on how gentle you are on your laser level. If you are not locking the pendulum, storing it in a place where it gets bumped around, or you are dropping it a lot, you will need to check the level accuracy at least every 6 months.
On the other hand, if you treat it with care you can keep it accurate for up to a year. Don’t forget to always lock the pendulum, gently moving it around (no sudden movements or jostles).
Conclusion
Don’t let an inaccurate laser level slow you down. Now you have the skills necessary to be up and running again with a super-accurate level that you calibrated yourself. If not you have tried your best and sent it to a professional to perfect for you. Either way, congratulations on learning more about maintaining your laser level for many more projects to come.