Now, out of all the DIY skills that you might learn in your lifetime, painting is one that you will undoubtedly come across no matter what the task. It might seem straightforward, but the skill of painting isn’t as simple as just grabbing a brush and throwing some paint on the wall. Whether its touching up a woodworking project or doing an entire room, its important to get painting right.
The hope is that this guide will allow you to approach a painting task with confidence and give you that professional look to your painting job. Whilst the guide focuses on painting renovation of a whole room, the techniques talked about can also be applied to smaller projects.
What you will need To Paint A Room
Due to its messy nature, you’re going to need a few things. Luckily, aside from the paint, it should be a cheap job for you. Before you start, make sure you have the following:
- A spare piece of large cloth OR plenty of newspaper
- Small step-ladder (or normal ladder if you have one): $20
- Set of standard brushes, ranging from 10mm-30mm: $4
- Rolling brush and spare roller: $4
- Spare baking tray
- Spare clothes
- Paint (the most important)
Getting started
Firstly, make sure you know what theme you’re going for. This could be a repaint of the same colour or an entirely new makeover, so make sure you have the correct colour. Standard water paint is suitable, especially if its quick drying.
As well as this, make sure you have enough paint-depending on the size of the project. This can vary, but for most renovation projects a 5L tub will do. Also, buying a 5L tub means the paint is cheaper per liter, so it’s better value for money.
Next, prepare the room for renovation. As mentioned, paint is messy, so make sure any furniture items in the room are removed prior. To prevent any paint getting over the floor, take your spare cloth or newspaper and line the sides/corners of the room with no gaps.
Brushes and tools – what’s best for what?
Firstly, the roller will be your main tool for large painting jobs. By using a roller, you cover a lot of area in a short amount of time, but still giving you a smooth-looking coating.
However, the brushes you purchased are just as necessary as the roller, as these will allow those tight corners and sides to get a clean coating of paint. These come in different sizes so the tighter/smaller the space that needs to be filled, the smaller the brush should be used.
Whilst these are the two main things you need; I suggest getting a roller with an attached extending handle. This is extremely useful when doing the ceiling as you can cover most the ceiling area without needing a ladder. They only cost around $5-10 more than a standard roller from most hardware stores.
Now you have the right equipment and know what to do with it, you’re ready to start painting. Although a simple task, painting requires caution and patience, as the quality of the coating is important.
How to paint a Room effectively
Step 1 – Paint the Ceiling/Roof
Its best to begin with the ceiling in any painting renovation project, as paint will undoubtedly get over the wall due to gravity. This means that you don’t waste time by doing all the walls and then ruining the coat with falling ceiling paint-as well as being frustrated that it happened.
To begin on the ceiling, grab your roller and roll it in paint from the tray. Only fill the tray halfway so you don’t overflow it, as this is still enough to paint with. Roll it a few times back and forth onto a separate tray so it isn’t dripping.
From here, begin rolling the paint onto the ceiling lengthways, starting from the sides. Make sure to roll the pain parallel with the direction of the wall-this then allows you to use brushes to paint in the same direction and give it that smooth look. Repeat this for all the sides, then fill in the remaining area.
Step 2 – Painting The Walls
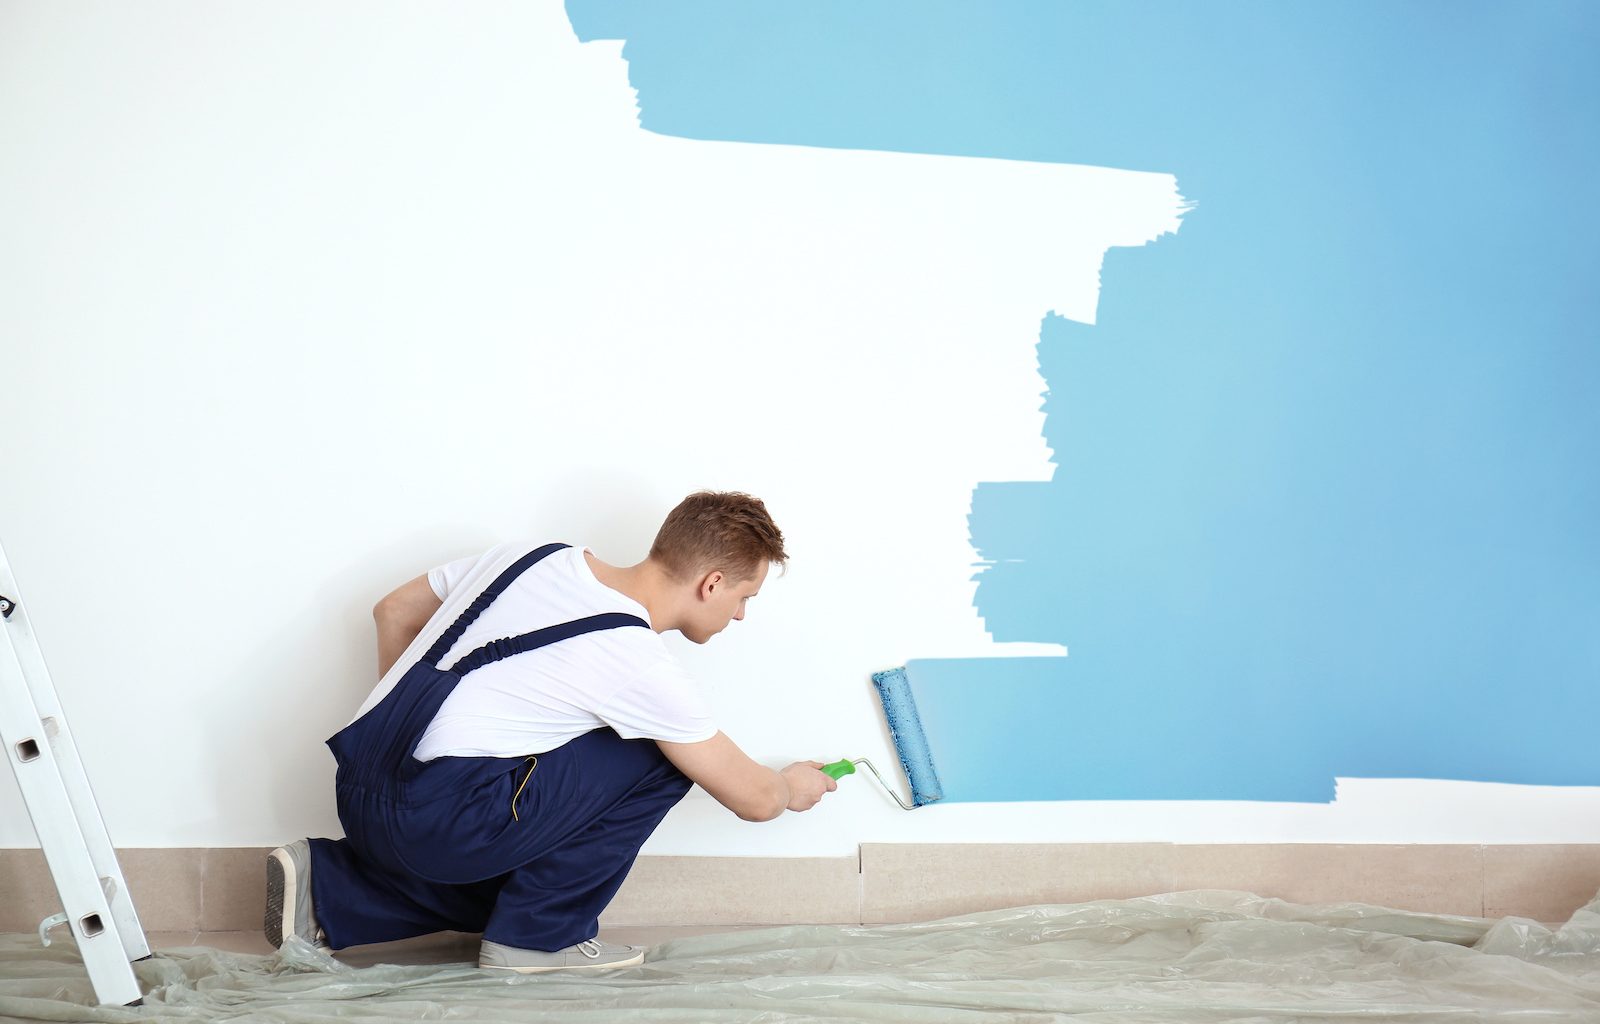
Using a roller again, begin to coat the walls vertically with a roller using the same technique as you did for the ceiling. Make sure to gradually move across the walls rather than quickly, as this blends in the paint to avoid any harsh lines or paint edges.
Step 3 – Filling The Gaps
Now the walls are mostly covered, all that remains are the sides and corners. To do this, pick up your 2 inch brush and lightly in paint. Begin doing light brushes upwards along the edges in direction with the rolled paint, palm facing up, then downwards with the other side of the brush to spread the paint out. Carry this on all the way round for both the ceiling and walls.
Once this is done, repeat but with a 1 inch brush, making sure you blend the paint in and touch the sides where the wall/ceiling or wall/floor meet. By using a thinner brush, you’re less likely to paint over the sides, but this must be done gently and slowly in single stroke brushes.
If you also want to paint your floor check our concrete floor painting guide to make sure you get the right paint.
Final Tips on Painting A Room
A second coating is always smart, as this allows the painting to last longer and means you can correct any mistakes or over painting. Once the painting is done, leave it for at least a day to dry, and then take out any protective cloth/papers and proceed to move furniture back.
Painting a room is a simple job but can look cheap and messy if not approached properly. That’s why the tips in this article should help any beginner pick up some paint and do a great job. Whilst paint can expensive, the equipment to complete is not-and is a great way to start any renovation project to give it a fresh look.