Whether it’s in your workshop or your backyard, a tool storage unit is perfect for any DIY’er or gardener. It’s a great way to organize all your tools and take up less working space without them getting misplaced or lost. Whilst many tool storage units are available online, it’s not so difficult to build your own with some DIY magic.
Since tools vary in size and shape, they can easily take up lots of space the more you own. They can come as hand tools or as power tools. Power tools are usually larger and heavier. That said, a storage unit needs to accommodate differently sized and shaped tools and needs to be compartmentalized to do this.
There are different ways you can make a tool storage unit, but this guide covers the simplest and cheapest method. We will use plywood and CLS timber, as this will provide the structural integrity necessary to hold plenty of weight. We’ve laid out what you’ll need and how to put it together below!
What Do I Need To Build A Tool Storage Unit?
As with any DIY job, you’re going to need some materials and tools to get the unit built.
You’ll need:
- Miter saw or circular saw
- Jigsaw
- Drill/driver
- Orbital sander with 120-220 grit sandpaper
- Woodscrews – boxes of 2” and 1 ½“
- Wood glue and wood filler
- Standard 2” x 2” CLS timber (available from most hardware stores)
- 1” plywood sheet
- Polyurethane and waterproof wood stain
- Countersink drill bit
- Door handle and hinges hardware with lock
You’ll also need to cut the plywood with the jigsaw and the CLS with a Mitre saw.
This job is more for intermediates but is not impossible for beginners, and in fact, makes for a good challenge!
Step 1 – Tool Storage Unit Main Frame
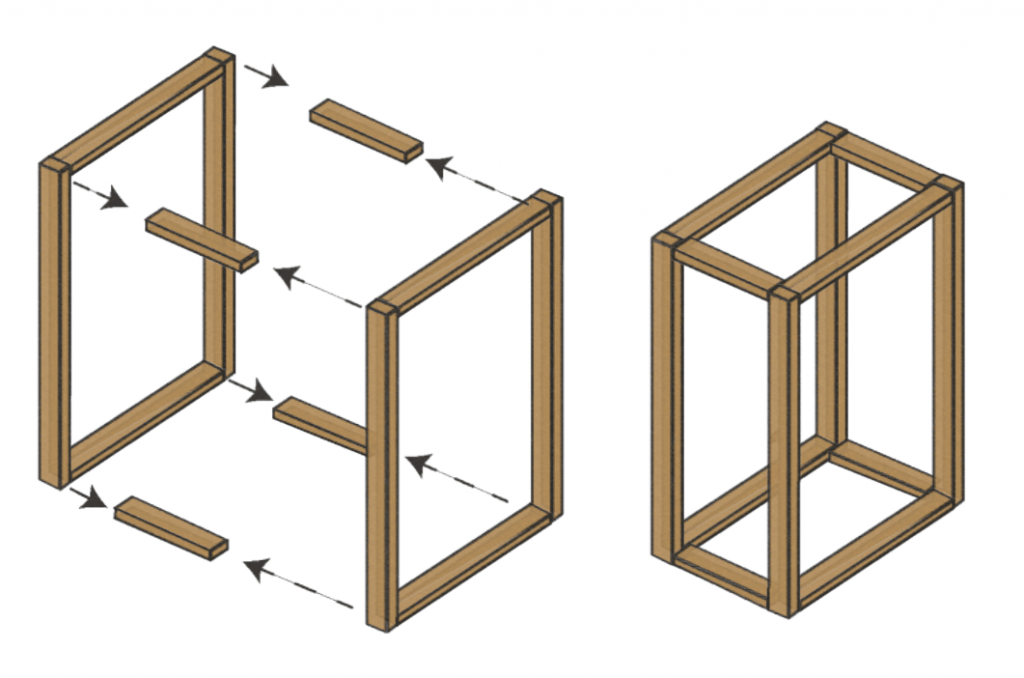
First up is making the tool storage unit frame, which is a simple step, but needs to be done right. Make this from CLS timber and will act as the support frame for the unit. This is mostly cutting and drilling, but it needs to be precise to support the rest of the build.
The frame will consist of four long pieces of CLS attached to eight smaller pieces at the top and the bottom to make it secure. All pieces must be joined by woodscrews via pilot holes or pocket holes to enhance structural integrity. Using wood glue and clamps to hold pieces in place prior to securing ensures accurate placement.
Method
To do this, firstly cut the long pieces to measure 72” in length. Cut four pieces that measure 45” in length, and using the long pieces, make two rectangular frames as seen below. Cut four smaller pieces that measure 30” in length and use these pieces to connect the two rectangular frames together.
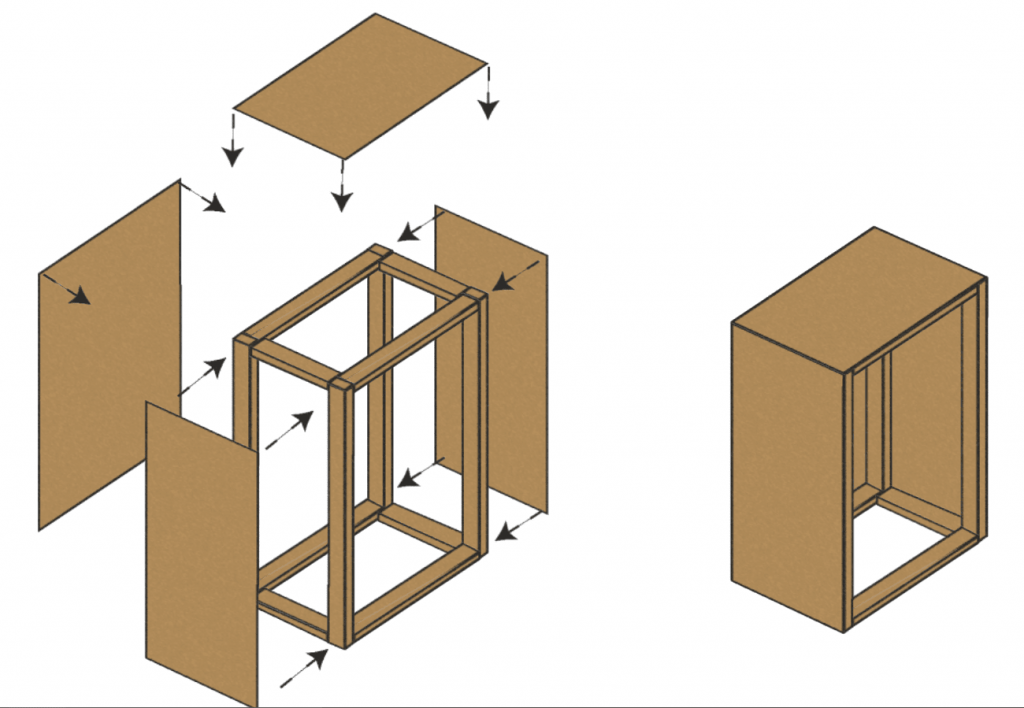
Once the frame is done, add the side panels. Using 1” plywood, cut the following pieces: two 72”x 32” (sides), one 72”x 49” (back), and one 32”x 49” (top). Make pilot holes and use 1½” woodscrews to secure these panels onto the frame as shown below. Each panel should line up with other panels on each corner.
Sand the frame with 220+ grit sandpaper and stain appropriately. Let it dry completely before step 2.
Step 2 – Divide The Tool Storage Unit
The next job is to make some dividers to compartmentalize the unit. This will consist of two dividers (plywood sheet) resting on divider supports (CLS). These dividers make a large space for heavy tools (e.g. Miter saw) and smaller space for longer tools (e.g. Shears).
Method
Using the same sizes in step one, cut one long piece of CLS (45”) and two short pieces (30”). Sand these pieces (220+ grit) and stain them appropriately, making sure they’re dry. Secure these pieces to the frame sides via pocket holes, making sure they’re 23” up from the frame bottom panels.
Repeat this but place the three pieces 11” from the first set of divider supports. Once again, secure to the sides with pocket holes, as this enhances strength and will allow for more weight. This might sound confusing, but the positioning is cleared up below for you.
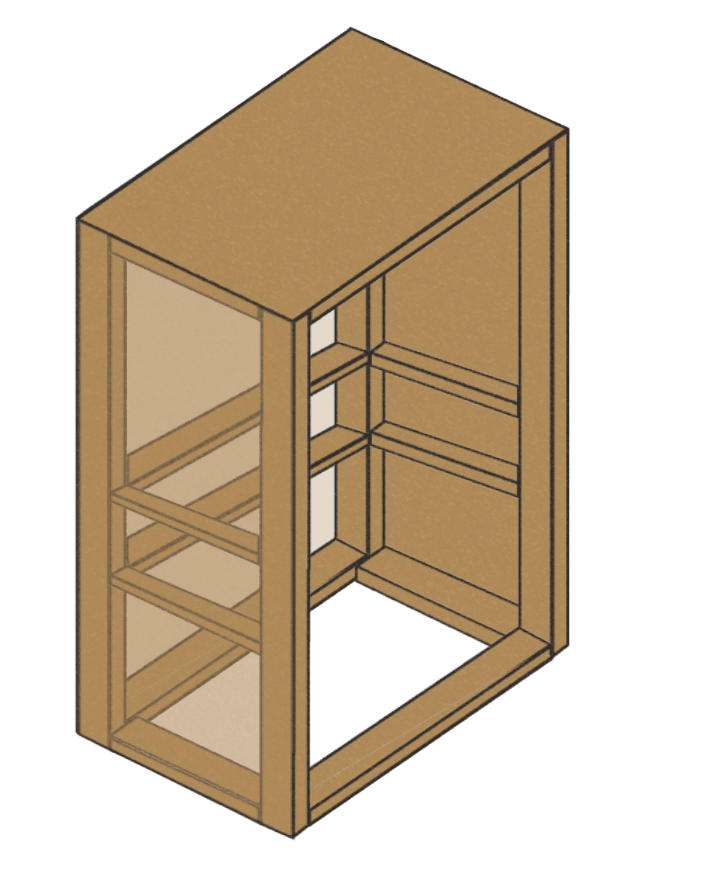
Once done, cut the dividers and place them onto the supports. Cut two pieces of 1” plywood measuring 43”x 28”, sanding it down and staining afterward. In two corners, cut a 1”x 2” cut so that 2” has been taken out the short sides and 1” from the long sides.
By making these cuts, you can now fit these dividers into the frame. The cuts should line up nicely with the 1”x 2” CLS and should smoothly fit into the frame. Once in, secure to the supports with wood glue and 1½” woodscrews.
This creates a large bottom space and a middle narrow space. You can put what you want in here, but it’s mostly suitable for larger or heavier power tools and larger garden tools. Either way, it’s up to you!
Step 3 – Smaller Shelving Unit
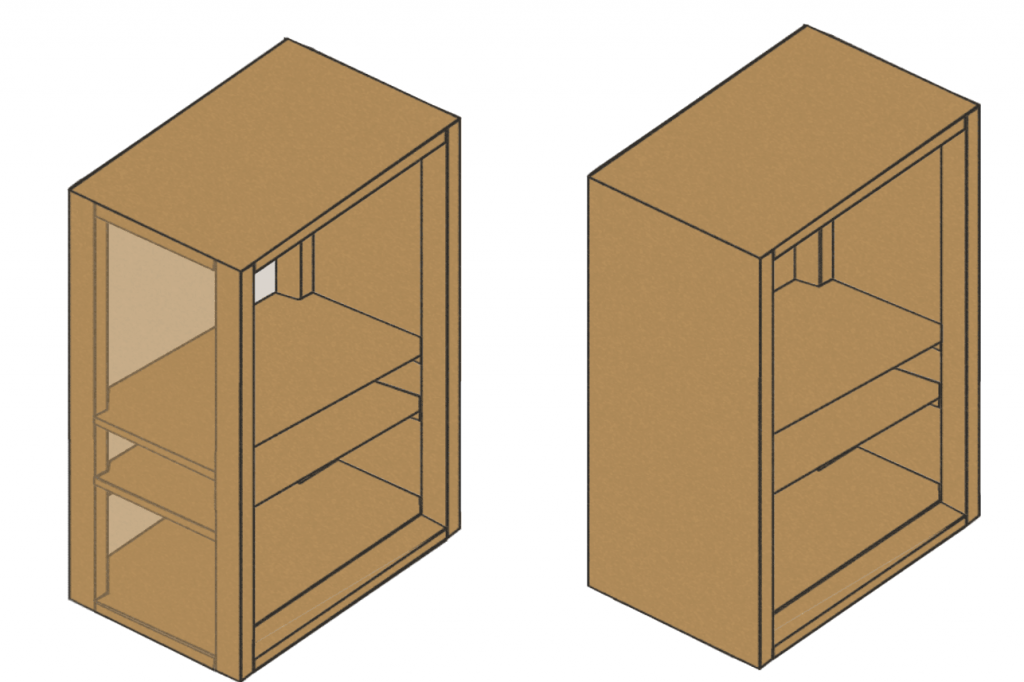
Next up are the compartments for smaller tools or smaller power tools. This smaller shelving unit will fit into the frame once completed and compartmentalize your smaller sets of tools. It’s important to build the unit first in completion (including the next step) and then fit it into the frame.
Method
To build this frame, firstly cut four pieces of CLS measuring 30” in length. Cut four pieces of 1” plywood: three measuring 34”x 30” and one measuring 30”x 45”. With these plywood pieces, make a ‘W’ shape as shown below.
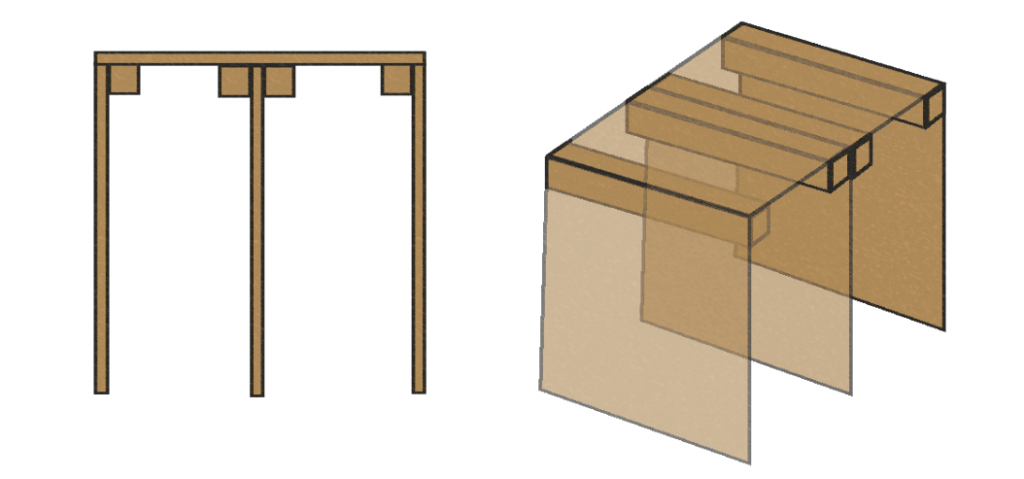
As you will see, the CLS pieces attach to the corners of this structure. Use 1½” woodscrews and wood glue to secure this structure together ensuring the CLS is firmly attached. Sand the structure down and stain appropriately.
Once done, cut four pieces of 1” plywood measuring 21.5”x 30”. These pieces are your dividers for the shelf unit, so sand and stain appropriately. Place 1 piece in one section and three in the other as shown below, securing with wood glue and woodscrews.

Give the unit additional sanding and staining to get it as smooth as possible. Once it’s ready, pick it up and slide it into the top of the mainframe. This should fit smoothly into the frame, but if it doesn’t, sand the sides down slightly.
The left side of this unit can be used for storing smaller power tools or medium or large garden tools. The right side compartments can be used for smaller DIY and garden tools, allowing you to organize them appropriately. We suggest separating the four compartments into DIY tools, garden tools, small hardware (nails, screws), and DIY and garden materials.
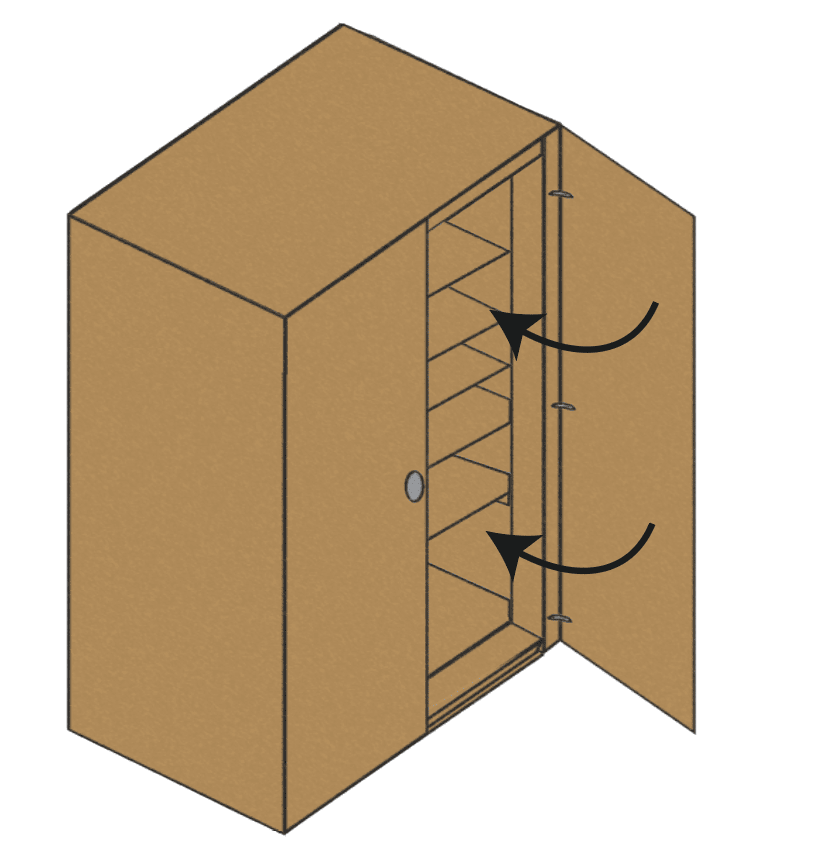
Step 4 – Making The Doors
A simple step, but just enough to finish off nicely. Cut two pieces of plywood measuring 72”x 22.5” and sand and stain them appropriately. Use metal hinges (3 on each side) to secure the doors onto the frame as shown below.
Install metal hardware, such as the lock, onto the doors once they’re secured.
By following these steps you’ve made a basic, wooden tool storage unit which will make organizing a lot easier. You have compartments for larger tools, longer tools, smaller power tools, and smaller hand tools. The use of CLS and 1” plywood provides the structural strength necessary to hold the weight of these items.
Tips and Tricks
- Use wood filler to fill any holes or screw holes in the wood for advanced aesthetic effect.
- Make additional holes in the back panel going into the wall and use wall plugs and screws to secure the tool storage unit to your wall.
- Add four pieces of CLS to the top of the unit for additional space on top.
- Put the heavier items (no matter what size) at the bottom.
- Add more compartments to the shelving unit (if necessary) by cutting more pieces of 21.5″x 30″.
Once you’ve built your tool storage unit, why don’t you check out our article on building a herb planter as your next project!