Introduction
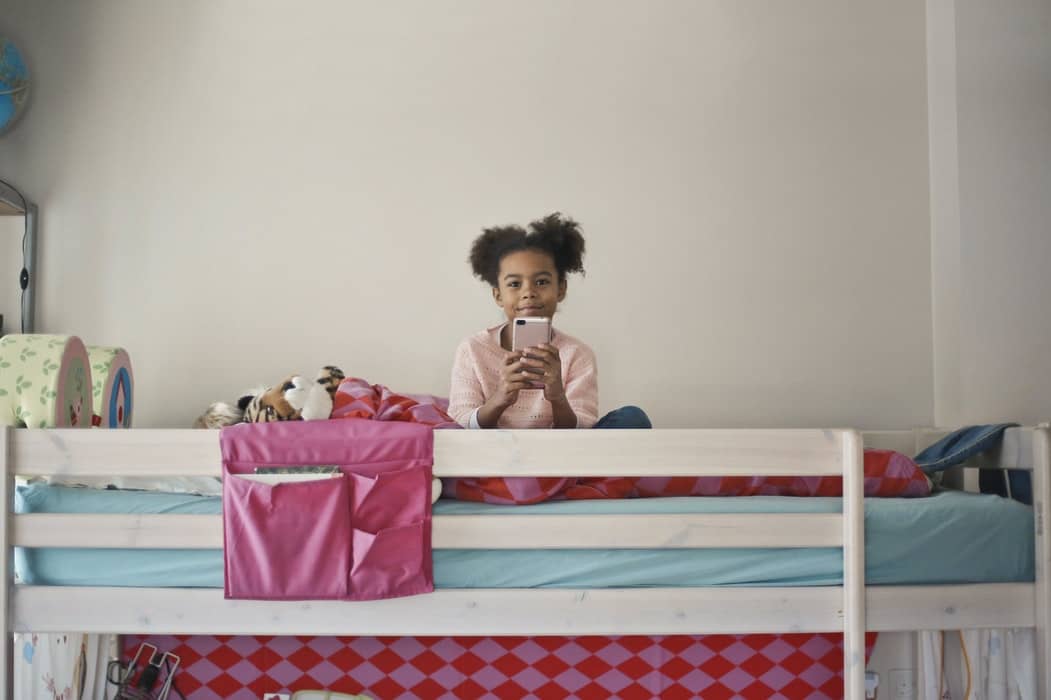
When I was 7 years old, I managed to convince my parents that a children’s bunk bed was a fantastic idea. I mean, climbing a ladder to sleep and having space underneath do to whatever I want? It was brilliant!
My bunk bed had a desk underneath with a single pullout mattress for guests. This was very practical. It gave the room more space and provided me with extra toy storage. Despite that, many bunk beds usually accommodate two beds. This is ideal if you have two children sharing a room.
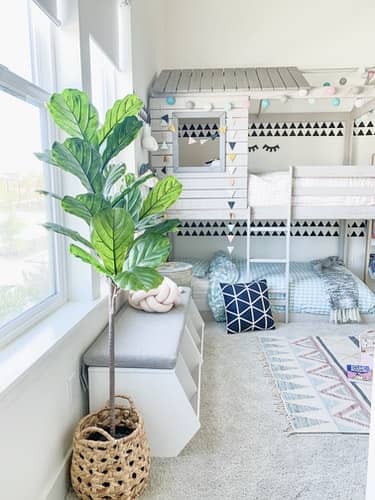
With that in mind, this article shows you how to build a children’s bunk bed out of wood in 5 big steps. I first guide you through the basic process for the frame. There is an optional step at the end for creating a bottom bunk. This allows you to decide if you want an additional bed underneath or a desk and storage area instead.
So, if you’re kids are wanting a bunk bed but you don’t want to splash the cash, this is for you. This is quite a challenge and not for beginners…but the kids will love you for it!
What You Need To Build A Children’s Bunk Bed
Any DIY project needs to begin with the right tools and materials. Check out our general masonry tools guide for tips on what different tools are good for. You will need the following equipment and materials:
- Drill or driver and a countersink drill bit
- Detail sander and orbital sander
- Jigsaw and circular saw (sliding mitre saw is also suitable)
- Safety equipment (like goggles and gloves)
- Wood glue (like Gorilla Glue)
- Wood filler
- Wood stain
- Spare cloth
- Wood clamps
- 1”x 8” plywood
- 1”x 4” plywood
- 1”x 2” CLS timber
- 2” woodscrews
So, get your tools out and start building a children’s bunk bed!
Step 1 – Building The Headboard And Footboard
Take your power tools and get everything set up in your workshop or work area. Once you’re ready, take your 1”x 8” plywood and cut four identical pieces that each measure 38” in length. Cut two pieces of 1”x 2” CLS that each measure 82” in length.
Sand down these 6 pieces with an orbital sander (180+ grit) and stain them appropriately. Once your pieces are ready, position them in the same way as shown below. Make sure to position the panels at the right distance from each other using the measurements provided.
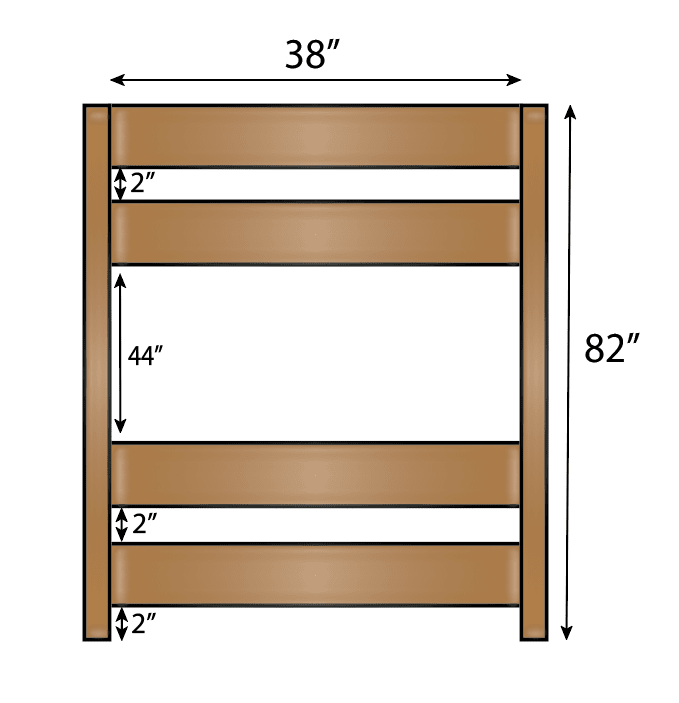
Use wood glue and clamps to hold this structure together. Ensure the measurements are still correct. Make 2 pocket holes on each end of each 1”x 8” plywood panel going into the CLS and secure with 2” woodscrews.
Repeat this whole step again to make two structures. You’ve then completed your headboard and footboard!
Step 2 – Children’s Bunk Bed Rails
In this build, there are two side rails. One will have the ladder on, so it’ll be shorter. The longer side rail needs to be made to be long enough for a children’s mattress (74.8”). So, the measurements you see must be used correctly or the mattress may not fit.
Longer Side Rail
You’ll notice the longer side rail appears a bit shorter in the image below, but there’s a reason for this. The CLS on the longer side rail will account for 4 additional inches (2” either side) which will make 76”. This should provide enough room for a single mattress to be placed without too much difficulty.
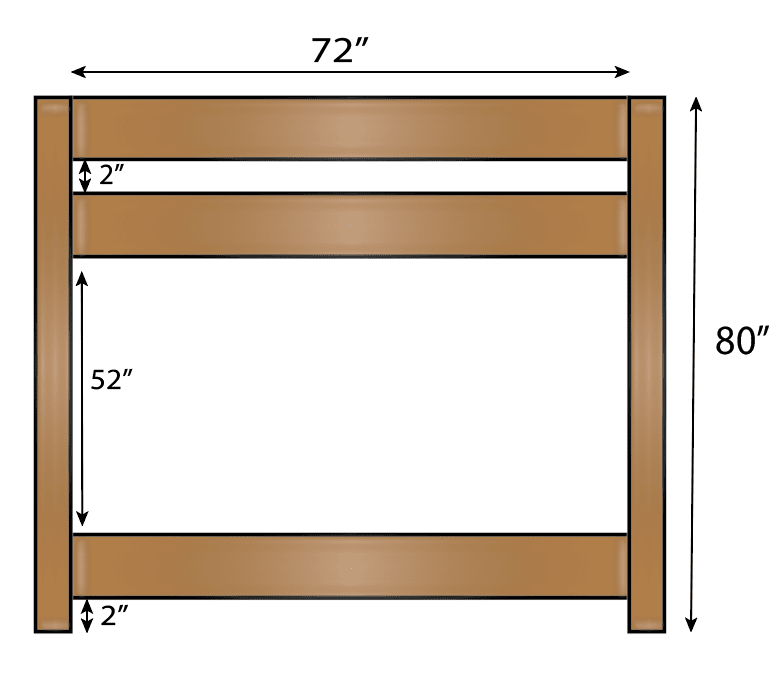
Now that’s clear, building this side rail is similar to step 1 for the headboard and footboard. This time, cut 3 pieces of 1”x 8” measuring 72” and 2 pieces of 1”x 2” CLS measuring 80”. Sand them down, stain them and arrange them as you see above.
Secure the structure with wood glue and clamps and leave it to dry. Once done, make 3 pocket holes on the ends of the 1”x 8” going into the CLS and secure with woodscrews. By making 3 pocket holes instead of 2, you provide additional structural integrity to support the children’s bunk bed better.
Ladder (Shorter) Side Rail
This rail is the side where your kids will get into the bunk bed from. This is effectively a shorter version of the side rail in step 2 which will allow space for the ladder. The width of the ladder and this side rail will both equal the same length as the long side rail.
So, with that in mind, this step is pretty much the same as for the longer side rail earlier in step 2. Using the same method, make the structure as seen below. However, make sure that the 1”x 8” panels measure 48” instead of 72”.
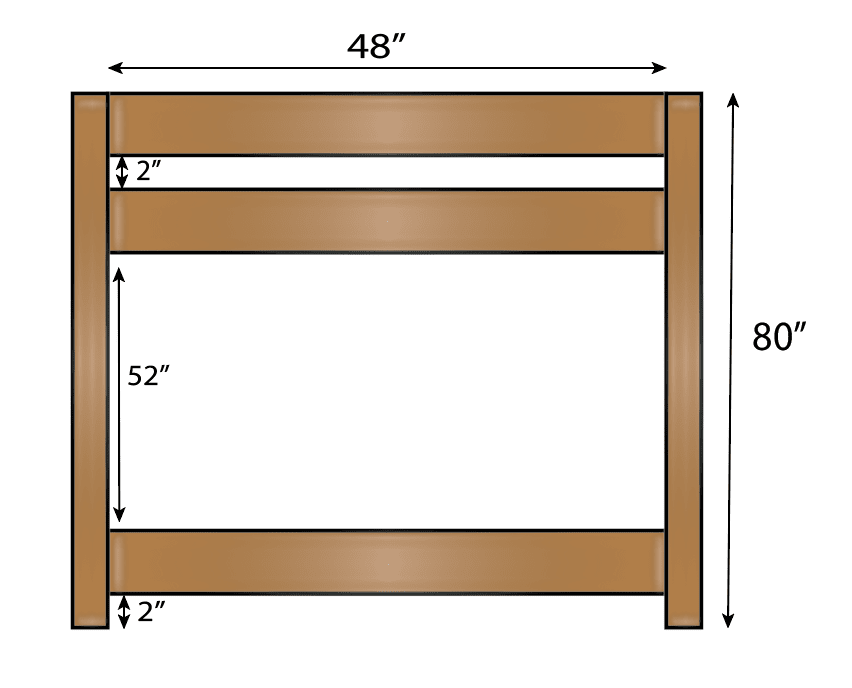
Once again, make 3 pocket holes on each end of the 1”x 8” to provide additional structural strength. Secure the structure together with glue, clamps and screws.
Step 3 – The Ladder Up To The Children’s Bunk Bed
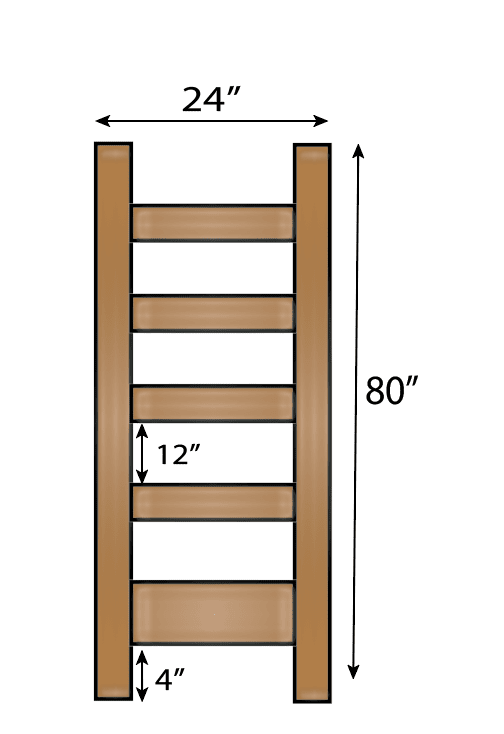
Now you’ve made the mainframe components, you’ll need the ladder to complete it. Cut one piece of 1”x 8” and four pieces of 1”x 2” that each measure 20” in length. These will be your ladder steps.
Cut two final pieces of 1”x 2” that both measure 80” in height. With these pieces, arrange a ladder structure using the measurements in the image below, ensuring they are exact and accurate. Secure with glue and clamps, before making pocket holes on the ladder steps and securing with woodscrews.
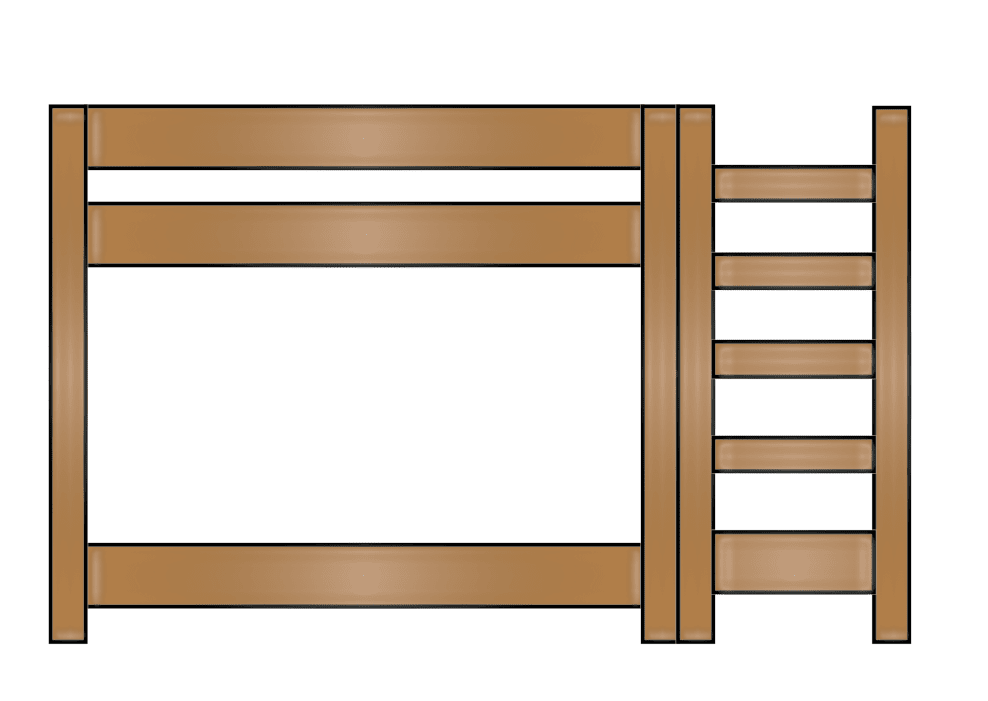
Now you’ve built your ladder, you need to attach it to its side rail. Line both pieces up as shown below, ensuring they are the same height and hold together with wood glue and clamps. Make pocket holes on the inner side of the shorter side rail that goes into the ladder and secure.
Step 4 – Put The Children’s Bunk Bed Together
Now you have your pieces, stand them up and hold them together with large clamps into a children’s bunk bed structure. Make sure the side rails are on the inside of the structure. Then, on the outside of the head/footboards, make plenty of pilot holes going into the side rails. This will provide extra strength and hold the bunkbed together better. Once done, take your drill and 2” woodscrews and secure them!
For a better aesthetic touch, use a countersink drill bit when making the pilot holes. Once the screws are fitted in, the wood filler will cover these holes up. Simply sand the holes and give the bed another stain and they’ll blend in nicely!
Step 5 – Don’t Forget The Slats!
Now you have your children’s bunk bed structure, it just needs some slats for the mattresses to complete it! Simply take your 1”x 4” plywood and cut 10 pieces measuring 40” in length. As well as this, cut two long pieces of 1”x 2” CLS that measure 76” in length for support rails.
On the inside of the structure, secure the support rails to their sides 10” from the top of the bed. Lay the slats equidistantly onto these side rails and secure them with wood glue and woodscrews. Ensure for this step you use plenty of both, as the structural support is vital.
Optional Bottom Bed
Repeat step 5 on the bottom of the bed so that you have two spaces to put a mattress. Make sure to sand them with a detail sander so it’s nice and smooth so it doesn’t damage the mattress.
What’s great about this step is if you don’t want another bed beneath, you don’t have to! Simply remove the lowest panel on the shorter rail and you’ll have an entire space to yourself. There’s plenty of ways to decorate this space, so check out our room decorating guide for ideas!